In my proof of concept I used a typical black background in my interviews and I wasn’t sure whether to do this again in my final film, or whether to use a coloured background of where the interviewee would typically be. In this case, I am hoping to conduct some interviews in school and so I would like to use a classroom as the background but have it out of focus with focus only on the subject who is being interviewed. Even though I had a rough idea of what I wanted my interviews to be like (regarding the background colours and lighting) I also wanted to explore and generate more ideas for my project. I have created this mood board to produce and reflect on my ideas for my interviews, I decided to do this because I find that mood boards are an easy way to create more imaginative ideas along with my original plans for my interviews. When creating mood boards for previous projects I have found that they have helped me generate more ideas and so I knew that it would help me develop my plans and also allow me to look at the different background colours and settings and compare them to my original thoughts.
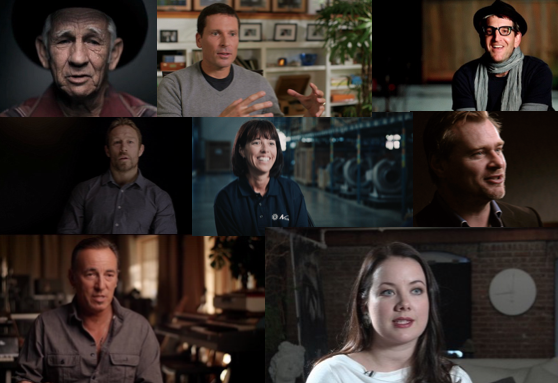
The images in this mood board use a range of different lighting and backgrounds, all of which give off different moods and show a range of genres within documentary, this shows how important lighting is in interviews. For example this first shot (below) looks like a corporate style doc/interview and the second shot (below) looks more like a serious interview or personal story interview.


I did some secondary research about lighting that I can use in documentary to get a better idea of what my interviews should look like when telling personal stories and how I can set up my lighting, LightsFilmSchool said “The basic 3 point lighting technique is a favorite amongst filmmakers. It fully exposes the facial expression and emotions of your subject as well as isolates them from the background and hides unwanted shadows.” I have used this type of lighting before in my proof of concept to light the subject well, darken the background of the subject and add a hint of colour to my interviews. Moving the lighting to create shadows and adjusting the amounts of light hitting the subject creates different moods and tones, this is shown in the mood board above. Using the lights to highlight or enhance facial features or ’emotions’ is very important for me to use in my interviews because I want to be able to get the emotions across to the audience through the use of camera work.
Lighting is one of the key components in interviews and so I decided to watch a documentary I had heard about on Netflix; Extremis. This film is set in a hospital and a lot of the lighting used is natural light that is already in the hospital; typically being the fluorescent white lights that are used throughout the hospital and rooms the subjects are in. Even though I won’t be filming in a hospital with white florescent lighting, I will be filming in a school which will have lights already there. From seeing how well done the lighting is in this film I am hoping to use the natural light already in the school, I will add more lighting if needed but I will try to use natural lighting as I really like how it looks in this film and I want my shots to look similar to these.


The lighting set up I will use will have a huge effect on how the overall shot looks and so after creating this mood board and researching more about lighting, I have decided to use the 3 point lighting set up again in my work, because I know what I want my interviews to look like now because of the research I conducted and I believe it was really effective in my proof of concept, it will help me enhance the mood of my doc and allow the audience to connect with the emotions shown on-screen. I will use a blue colour in my lighting and interviews because it is used to represent anti-bullying and is used in a lot of charities.
To practice getting shots with different lighting I decided to set a shot up in the TV studio with set up lighting using ‘dedo’ lights and then another in a class room using the artificial/fluorescent lights that are already in the room. I wanted to do this to compare the effects that different lighting has, it also allowed me to practice changing ISO, aperture and shutter speed in different lighting.
Below are the shots I captured. I really like shot I got in the studio, the colours are made to look clear and crisp, it has created catch lights in the subjects eyes which I think looks really nice and the overall lighting creates a dramatic tone. Comparing this shot to the one I got in the class room shows drastic differences: the lighting gives an off yellow colour, the colours don’t look as appealing or clear and it gives a sort of clinical look to the shot.
After researching more about lighting I decided that I would research backgrounds for interviews and the effects that each one has, Chris Lavigne said “Seeing people in their natural environment feels genuine and adds a sense of time and place to the scene. A natural backdrop feels spontaneous, rather than like an artificial setup.” This is what I am hoping to achieve when I film interviews in schools, I want my interviews to look natural and I want the audience to know where the subject is from (for example; student or teacher in a school.) Lavigne then went on to say “If the background doesn’t look interesting or isn’t important to the story, use a fast lens […] and blur it out. This keeps the focus on the person and away from what’s happening behind them” as I want the subject to be the main focus in the interviews, I will blur out the background when I am shooting in schools and I believe that this quote backs up my original idea of doing this and so I have decided to definitely use this in my interviews.
After looking at this research and conducting my own tests I have decided that I will use coloured/setting backgrounds when interviewing the teachers and pupils in school but keep it simple and have it out of focus. And when doing more personal interviews I will shoot them in the TV studio with a black background with blue lighting on the subject like I did in my proof of concept. I believe that having a plain background when the interview is more personal will make the audience more focused on the subject and what they’re saying, where as using a classroom as the background when talking to children and teachers will make the audience automatically know that the subjects are people who work or study in school and have had experiences with bullying/ know about bullying.
The images in my mood board are the sort of images I would like to capture myself and I really like the look of the interviews and the colours/lighting and backgrounds used. I also chose these images because they’re similar to the type of shot I am hoping to capture in my interviews. Before creating this mood board I wasn’t sure on what type of background I wanted to use in my interviews, however now that I have had time to create this research I now know the backgrounds I want to use in my interviews and the style of lighting I will need to be able to develop my interviews and create different moods and tones in my film.
As I decided to use colourful and location setting backgrounds I decided to watch some documentaries to look at what other people use in their documentaries and see which ones work best. A film that I recently watched; blackfish, used a range of backgrounds and colours in the interviews. I believe that they used the backgrounds really well and it allowed me; the audience, to get to know the subjects just from knowing where the subject is (location). Similarly to my ideas, the background in their interviews are out of focus and the subject is in focus. Looking at these has made me confident in my ideas to use this style in my film and I hope to capture shots like the ones below.


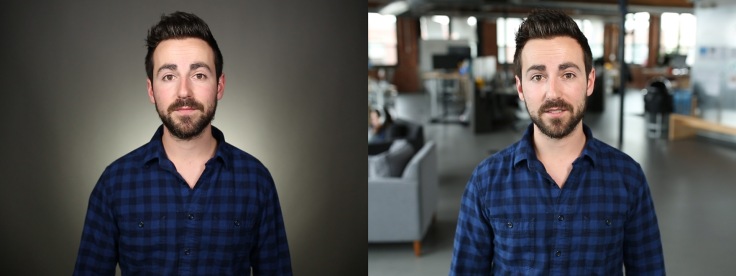
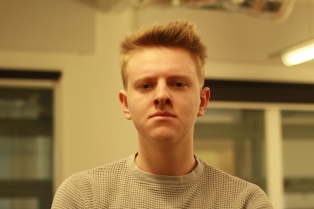
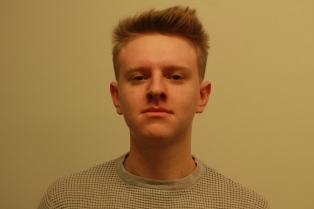
In this comparing image below, the black plain background makes the interview look more serious and personal; this is the type of background I will use when shooting individual interviews with people who have been bullied before. The other image has a setting (which the audience presume is somewhere the subject spends a lot of time) this is what I will use when filming in schools; I will use a classroom but have it out of focus, similarly to the above shot.
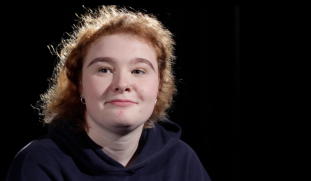
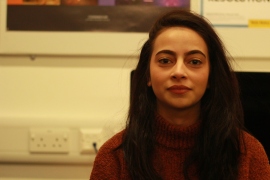
To practice this myself I decided to recreated the shots above, one with the plain background and one with a busy background out of focus. I decided to do this to help me understand what the differences are and the effects that the different backgrounds have. I wanted to practice my camera skills and work on how I can effectively use a busy background whilst keeping it out of focus. I believe that I did this well, the first image is well-lit and the back ground is out of focus, which is exactly what I wanted to achieve. The second photo isn’t lit well however the background is plain and how I wanted it to look, comparing these images is the same as the ones I researched above however I have learnt how to create this look myself. From doing this I am now more aware of the effects that the different backgrounds have and how to recreate these shots in interviews and in different locations.
Overall this research has helped me lot with deciding what interview style to go for, it has given me the chance to compare my ideas to existing documentary style interviews and think and analyse in more depth about how my ideas will be effective in my type of documentary.

Leave a comment